
How To Take Screenshots Of Windows 8 Menu Screen
Here is how to take Screenshots of Windows 8 Menu Screen. I have been using the popular Gadwin Print Screen to capture screen for quite a long time. And with the installation of the all new Microsoft’s Windows 8 Metro UI, I tried taking screen shot with the same software but came across few difficulties in capturing a screen shot of Windows 8 Menu Screen. Huh!..at last I succeeded.
Follow the below given steps to capture the Windows 8 menu screen as an image. Lets begin with the steps to use Gadwin print screen on Windows 8 Menu Screen.
Steps To Take Screenshots Of Windows 8 Menu Screen:
To take a screenshot on Windows 8, you need to have a screen capturing software, like I work with Gadwin Print Screen.
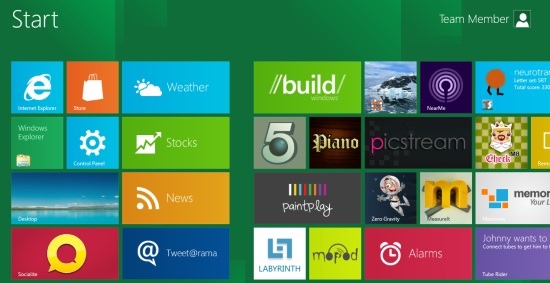
Step 1: Open the Windows 8 menu screen
Step 3: Press the hotkey structured for Gadwin Print Screen like I selected the “Print Screen SysRq” in short PrtScn key as my hot key.
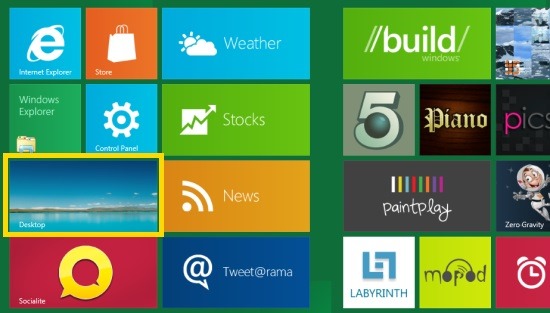
Step 6: Then, click on the Desktop Icon given at the menu screen
Step 7: Now, capture the screen and press the right-click of your mouse
You are almost done with your screenshot, now you can crop, tilt or save the screenshot according to your desire.
Do not miss out our post on Windows 8 Keyboard Shortcuts.
Go ahead and try out yourself.