How To Enable Safe Mode in Windows 8
Here is a quick tutorial for how to enable safe mode in Windows 8. Unlike in previous versions of Windows, safe mode is not enabled by default in Windows 8. Thus, some manual configurations are required to enable it.
First, search for “cmd” in the apps search. You can open apps search by pressing Window Key +Q. Right click the cmd app and select “Run as administrator” from the advanced menu.
Also check out our post on How to enable Delete Confirmation Dialog in Windows 8.

Type the below given command in cmd and press enter:
bcdedit /enum /v
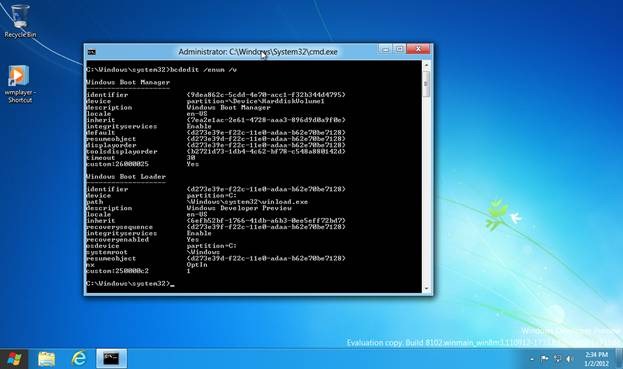
In the “Windows Boot Manager” list, copy down the reference number for “default” attribute.
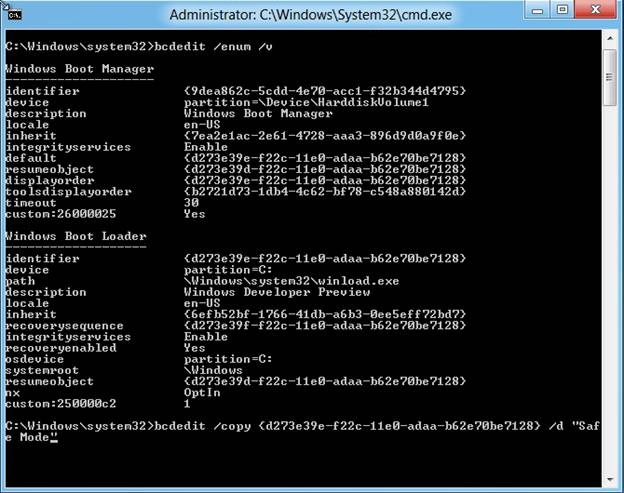
Next, type the following command and press enter:
bcdedit /copy {default reference number} /d “Safe Mode”
Now, exit from the cmd. Open “Run” using the shortcut key Window Key +R and type msconfig. Click OK.
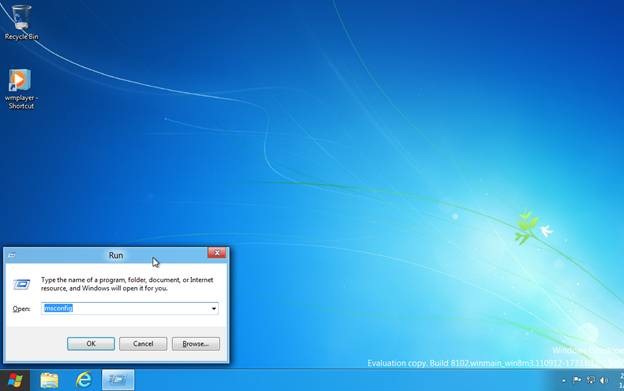
This will open the system configuration dialog box. Click on the “Boot” tab. Select “Safe Mode” and enable “Safe boot” from the Boot options. Enable “Make all boot settings permanent” and click Apply button. You will be asked for system restart. Click OK.

When Windows is restarting, press F8 to look for the boot options. Click “Use another operating system”.
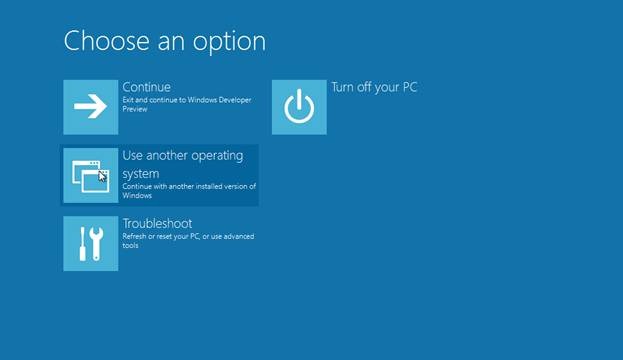
Now, you will see an option labeled “Safe Mode”. Click on it and Windows 8 will now open in safe mode.
