How To Control Automatic Maintenance In Windows 8
Here is a tutorial on how to control automatic maintenance in Windows 8. Windows 8 has a control automatic maintenance feature which schedules the maintenance time. This allows automatic updates of software, also performs security scans and runs system diagnostics at the scheduled point of time.
By default, you can see the maintenance task runs automatically at 3:00am, if you aren’t using your PC at this point of time. If you are using PC at scheduled point of time, then it will wait until you finish your task and looks for idle time on PC to perform automatic maintenance on your PC.

Lets move ahead and check out how to customize automatic maintenance in Windows 8.
How To Control Automatic Maintenance In Windows 8:
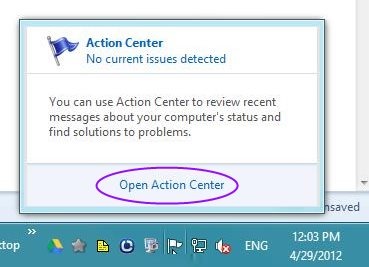
- First of all, start with customization, you need to click on the flag like icon available in the system tray.
- You will see a pop up, then click on “Open Action Center”.
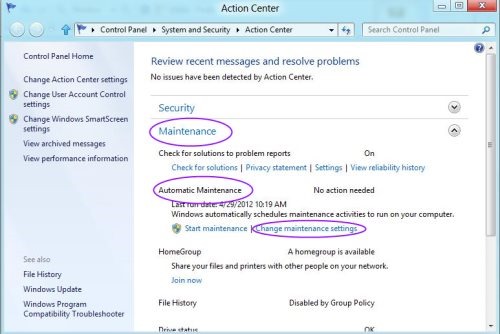
- Now, switch to “Maintenance” option and check for “Automatic Maintenance”, you will need to click on “Change Maintenance Settings”.
- After clicking on “Change Maintenance Settings”, you will see an Automatic Maintenance screen, set the appropriate time.
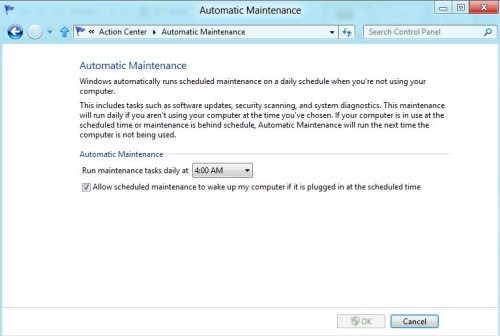
- You can also let the scheduled maintenance to wake up my computer if it is plugged-in at the scheduled time.
- Hit “Ok” to get your changes applied on your PC.
Also, check out our post on how to customize search apps in Windows 8.
Now, it’s not difficult to set scheduled automatic maintenance on your PC, all your software would be up-to-date, processes all security scan and run system diagnostics at the appropriate scheduled point of time.
The best part is that it starts automatic maintenance, when your PC is in idle state.